Monday, November 17, 2014
How to Replace the Water Pump on a 2001 Grand Cherokee 6 Cylinder
The Grand Cherokee is a mid-size sport utility vehicle produced by the Jeep division of Chrysler. The WJ versions of this vehicle include the 1999 to 2004 models and represent a complete redesign over the previous Grand Cherokee. The most common engine in the 2001 Grand Cherokee is a 6-cylinder, 4.0-liter engine. The replacement of the water pump on this engine requires you to remove additional components to access the water pump.
Instructions
- 1
Allow the vehicle to sit over night to ensure the coolant will not burn you. Place a container under the radiator drain and remove the drain cock. Drain the contents of the radiator into the container and replace the drain cock. Store the coolant for later use.
2Disconnect the cable for the negative battery terminal with a socket wrench so you dont start the engine inadvertently. Detach the electrical connector for the cooling fan and remove the accessory drive belt. Disconnect the cooling fan and its pulley from the engine.
3Remove the retaining bolts for the water pump pulley with a socket wrench and disconnect the power steering pump. Detach the coolant hose and heater hose from the water pump. Disconnect the mounting bolts for the water pump and remove the water pump. Discard the gasket for the water pump.
4Clean the mating surfaces of the water pump and engine to remove any traces of the old gasket. Place a new gasket onto the new water pump and install the water pump to the engine. Torque the mounting bolts for the water pump to 17 foot-pounds with a torque wrench.
5Attach the heater hose and radiator hose to the water pump. Install the water pump pulley and torque its mounting bolts to 20 foot-pounds. Connect the power steering pump and the cooling fan assembly. Torque the mounting bolts for the cooling fan to 31 inch-pounds. Install the accessory drive belt and attach the electrical connector for the cooling fan.
6Connect the battery cable to the negative terminal with a socket wrench and ill the cooling system. Start the engine and check for leaks in the cooling system.

Wednesday, April 9, 2014
Why Does Water Leak From My Exhaust
Water leaking from the exhaust pipe of a car is caused by the catalytic converter and the condensation of water vapor, according to autoupkeep.com. This is normal and nothing to worry about.
Combustion
The combustion of gasoline produces carbon dioxide and water vapor, according to chemistryland.com. Oxygen reacts with hydrogen in gasoline to produce water vapor, which exits the engine through the exhaust manifold.
Exhaust System
The exhaust, which includes carbon monoxide, nitrous carbon dioxide, water vapor and unburned gasoline are processed by the catalytic converter, which changes the gasoline to more carbon dioxide and water and directs them into the muffler.
Other Facts
In hot weather, the water vapor is less likely to condense and drain, but in cold weather, water vapor will do exactly that and drip from the tailpipe. Over time, water in the exhaust system can cause corrosion.
Wednesday, March 26, 2014
How to Replace the Water Pump in a 1991 Mazda MPV
The Mazda MPV is a minivan produced by Mazda since 1989. Rear-wheel drive was standard on the 1991 model, but a 4x4 version was also available. The term "4x4" in this context indicates that the vehicle has four wheels that receive power from the drivetrain independently. The water pump in a 1991 Mazda MPV attaches to the front of the engine block and its replacement requires the removal of several additional components.
Instructions
- 1
Start the engine and remove the electrical connector for the fuel pump. Allow the engine to stall and turn the ignition off. Connect the electrical connector for the fuel pump.
2Remove the cable to the negative battery with a socket wrench to prevent the battery from causing sparks. Disconnect the air cleaner assembly.
3Place a sealable container under the radiator drain and open the radiator drain cock. Allow the coolant to drain into the container and replace the drain cock. Seal the container of coolant for later use.
4Disconnect the electrical wires to the spark plugs. Remove the air duct assembly, cooling fan, and cowling for the radiator with a socket wrench. Disconnect the drive belts and the pulley for the air-conditioner idler.
5Disconnect the baffle plate for the crankshaft pulley and remove the pulley with a socket wrench. Detach the coolant bypass hose and the upper hose for the radiator. Remove the retaining bolts for the timing belt cover, and remove the timing belt cover.
6Disconnect the upper idler pulley with a socket wrench and mark the direction of rotation on the timing belt so that you can install it correctly later. Remove the timing belt and the tensioner for the timing belt.
7Disconnect the mounting bolts for the water pump with a socket wrench. Remove the water pump from the engine block and discard the gasket for the water pump. Clean the mating surfaces for the gasket with a clean shop towel. Coat the new gasket with sealer and place it into position. Install the new water pump onto the engine and tighten the mounting bolts to between 14 and 19 ft.-lbs. with a torque wrench.
8Complete the water pump installation by performing steps 2 through 7 in reverse order. Fill the radiator with coolant and connect the air cleaner assembly with a socket wrench. Attach the cable to the negative battery terminal.
Friday, December 27, 2013
What Is Wrong With Your Vehicle if There Is White Smoke Water Coming Out of Your Muffler
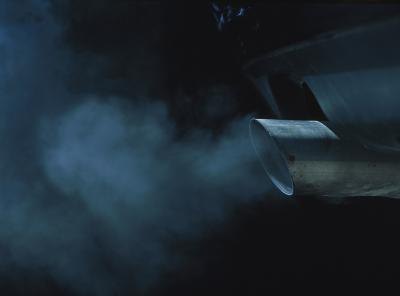
The tailpipe of your vehicle extends off the muffler. It is not uncommon to see smoke coming from the tailpipe, which is the last component and exit of a vehicles exhaust system. Smoke is not always a cause for concern, but always note the color. Color and odor of the exhaust smoke are sometimes the first clues in diagnosing problems with the vehicles exhaust and cooling systems.
White Smoke
Every vehicle is likely to show a small amount of white smoke when first started, especially on cold mornings. As long as the smoke disappears as the engine warms up, there is no need to worry. Its the result of cold fuel and steam as the manifold heats up, and the white is actually the steam burning off.
Coolant Leaks
Theres a more serious problem if your vehicle continues to emit white smoke after it is fully warmed up. This indicates the presence of either water or coolant antifreeze in the combustion chamber. Since these substances are not supposed to be burned during internal combustion, they can cause serious problems with your engine -- often indicating a damaged head gasket -- that are costly to repair.
Checking for Leaks
The odor of the smoke can indicate if you have a coolant leak. If antifreeze is present in the combustion chamber, the white smoke will have a sweet smell. Also check your oil. Milky oil indicates the presence of coolant but can also mean nothing; heavy humidity can cause moisture to form in the crankcase, resulting in a similar symptom. Do not attempt to drive your car if the oil looks more like a milkshake than motor oil, as this is a sign of excessive water or coolant in the oil.
Moisture
Water coming from the tail pipe is usually nothing to be concerned about. It indicates condensation buildup, or is the byproduct of the steam when first starting the vehicle. Most exhaust systems dispel small amounts of water through the tail pipe. Water from the muffler itself is also a normal occurrence, and is likely coming from the weep hole. This water is a byproduct of the catalytic converter, which helps control the vehicles emissions.
Saturday, November 23, 2013
How to Repair a Water Damaged Vehicle
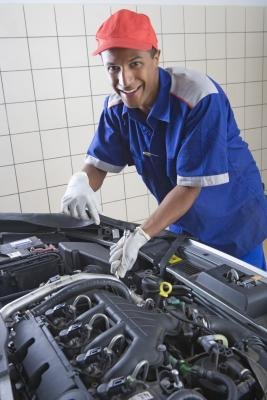
Floods, hurricanes and other disasters can result in cars partially or totally covered with water. In some cases, the price of restoring a drowned car to serviceable condition would eclipse the value of the car, so you or your insurance company should just scrap it. In other cases, it is possible to dry out a flooded vehicle, enabling it to provide many additional miles of safe, comfortable driving. Though drying out the interior upholstery and seats is a challenge, its more important to remove all the water-contaminated fuel, oil and fluids to ensure the systems they control or lubricate operate correctly and safely once the rest of the vehicle is rehabilitated.
Instructions
- 1
Drain the engine oil by removing the drain plug in the oil pan and allowing the oil to run into a drain pan. Change the engine oil filter, then replace the engine oil with fresh oil.
2Drain the engines cooling system by loosening the hose clamp on the lower radiator hose and disconnecting the hose allowing the coolant to drain into bucket. Reconnect the hose then refill with fresh antifreeze/water mixture.
3Drain the transmission oil by removing the bottom pan on the transmission by unbolting the bolts around the perimeter of the pan. Drain the fluid into an oil drain pan. Replace the transmission filter located under the transmission pan, reattach the pan then refill the transmission with the specified amount of transmission fluid.
4Drain the brake fluid from the brakes, master cylinder and brake lines. Use a wrench to open the bleeder valves located on each wheel the pump the brakes until all the fluid is expelled. Add new brake fluid to the master cylinder, then bleed each brake individually to remove all the air from the brake system. Capture as much used and purged brake fluid in plastic containers, then clean up the fluid that dripped onto the tire, wheel supports or floor.
5Remove all the gasoline from the fuel tank either using a siphon hose or by removing the gas tank and dumping out the gasoline into a bucket. Refill the gasoline tank and add gas-line antifreeze to absorb any residual moisture in the system.
6Drain the power-steering reservoir by removing one of the hydraulic hoses, then rotating the steering wheel back and forth until all the fluid is pumped out. Capture the used oil in an oil drain pan. Refill the power steering reservoir with power steering fluid.
Friday, November 22, 2013
Installation Instructions for an Eagle Talon Water Pump
The Eagle Talon is a compact sport car also marketed as the Mitsubishi Eclipse and the Plymouth Laser. Chrysler and Mitsubishi manufactured the Talon in a joint venture from 1989 to 1999; the latest version included the 1995 through 1999 model years. A late model Eagle Talon has a four-cylinder 2.0-liter engine with the water pump on the front of the engine. The installation of the water pump in this vehicle also requires you to drain the radiator.
Instructions
- 1
Remove the cable on the negative battery terminal to prevent starting the engine during the procedure. Place the drain pan under the radiator drain, and remove the drain plug. Allow the coolant to drain into the container and store it for later use. Replace the drain plug.
2Disconnect the pivot bolt for the alternator brace with a socket wrench and remove the alternator brace from the water pump. Remove the retaining bolts for the rear cover of the timing belt and detach the rear cover from the engine. Disconnect the timing belt.
3Remove the mounting bolts for the water pump with a socket wrench. Detach the water pump from the engine. Discard the gaskets and O-rings for the water pump.
4Coat a new O-ring with water; mount it onto the water inlet pipe. Place a new gasket on the new water pump; install it to the engine block. Torque the mounting bolts for the water pump to between 8.7 and 11 foot-pounds with a torque wrench.
5Install the timing belt and the rear cover for the timing belt with a socket wrench. Connect the alternator brace and tighten the pivot bolt for the alternator brace to 17 foot-pounds.
6Fill the radiator with coolant. Reconnect the cable to the negative battery terminal. Start the engine and check for coolant leaks.
Tuesday, November 12, 2013
How to Install the Water Pump on a 2003 HEMI 5 7
A Chrysler Hemi is an eight-cylinder engine named for its hemispherical combustion chamber. Chrysler has made three generations of this engine type, with the third generation entering production in 2003. A Hemi 5.7 engine typically appears in large Dodge vehicles and is a common option in Dodge RAM 2500 and 3500 pickup trucks. The water pump in these vehicles is on the front of the engine and you must remove several components to access it.
Instructions
- 1
Disconnect the cable on the batterys negative terminal with a socket wrench. Place a drain pan under the radiator drain and remove the drain plug. Drain the coolant into the drain pan and replace the drain plug.
2Place a square drive ratchet into the hole on the belt tensioner arm and rotate the tensioner clockwise to release the belt tension. Remove the drive belt and release the tensioner.
3Disconnect the shroud for the cooling fan and remove the cooling fan with a socket wrench. Detach the coolant-recovery bottle and the windshield washer bottle. Remove the compressor for the air conditioner and brace for the alternator.
4Remove the idler pulleys and belt tensioner with a socket wrench. Detach the hoses on the radiator and heater.
5Disconnect the mounting bolts for the water pump and remove the water pump from the engine. Install the new water pump and torque the mounting bolts to 18 foot lbs. with a torque wrench.
6Perform steps 2 through 4 in reverse sequence to complete the water pump installation. Connect the cable for the negative battery terminal with a socket wrench and refill the radiator with coolant. Start the engine and check for coolant leaks.
Monday, October 21, 2013
How to Replace a Water Pump for a 1998 Chevrolet Monte Carlo
Its not difficult to replace the pump for a 1998 Chevrolet Monte Carlo. In fact, replacing a pump should a priority since a deteriorating pump is generally the root of poor fuel economy and lackluster vehicle performance. The Monte Carlos engine wont even operate if the pump isnt working. The pump located inside the 1998 Chevrolet Monte Carlo is accessed through a panel in the trunk.
Instructions
- 1
Use the socket wrench to remove and take out the fuel pump relay. Its attached on the engine compartments right side near the fuse panel. Turn on the engine. Let it run until it stops so that the fuel pressure will be relieved.
2Take out the trunk liner. Remove the cars spare tire. Youll now see the cars access panel which will allow you to access the pump. Take of the bolts which hold the pump in place. Take off the panel.
3Inspect the pump assembly. Clean out any dirt or debris from around it. Unsnap the fittings which keep the lines in their place. Disconnect the electrical connector. Unlatch and remove the large ring which holds the pump assembly.
4Take off the pump assembly. Replace it with the new one. Put the latch back into its original place. Carefully plug the electrical connector back in. Put the spare tire back in and reinstall the access panel.